Adding Virtual Try-On to Shopify in 5 Minutes
Shopify merchants can now offer immersive virtual try-on on their Shopify store without writing a single line of code. Here's how to get started with TryOn Virtual's Shopify app.
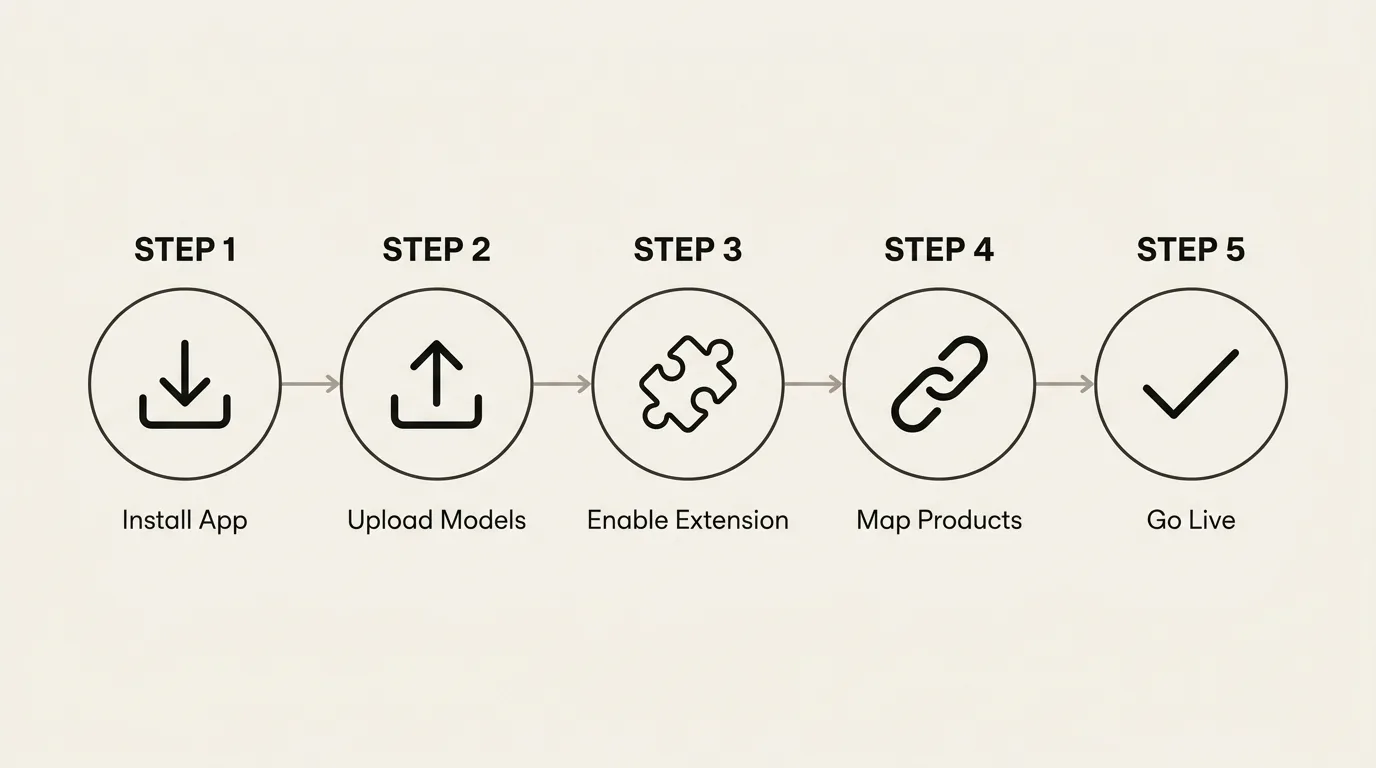
Step 1: Install the App
Visit the Shopify App Store and click Add app. Authorize the required permissions and you're ready to configure.
Step 2: Upload Your 3D Models
TryOn Virtual supports GLB, GLTF, USDZ, SPZ, and PLY formats. Upload your product models through the app dashboard. Our system automatically optimizes them for web performance.
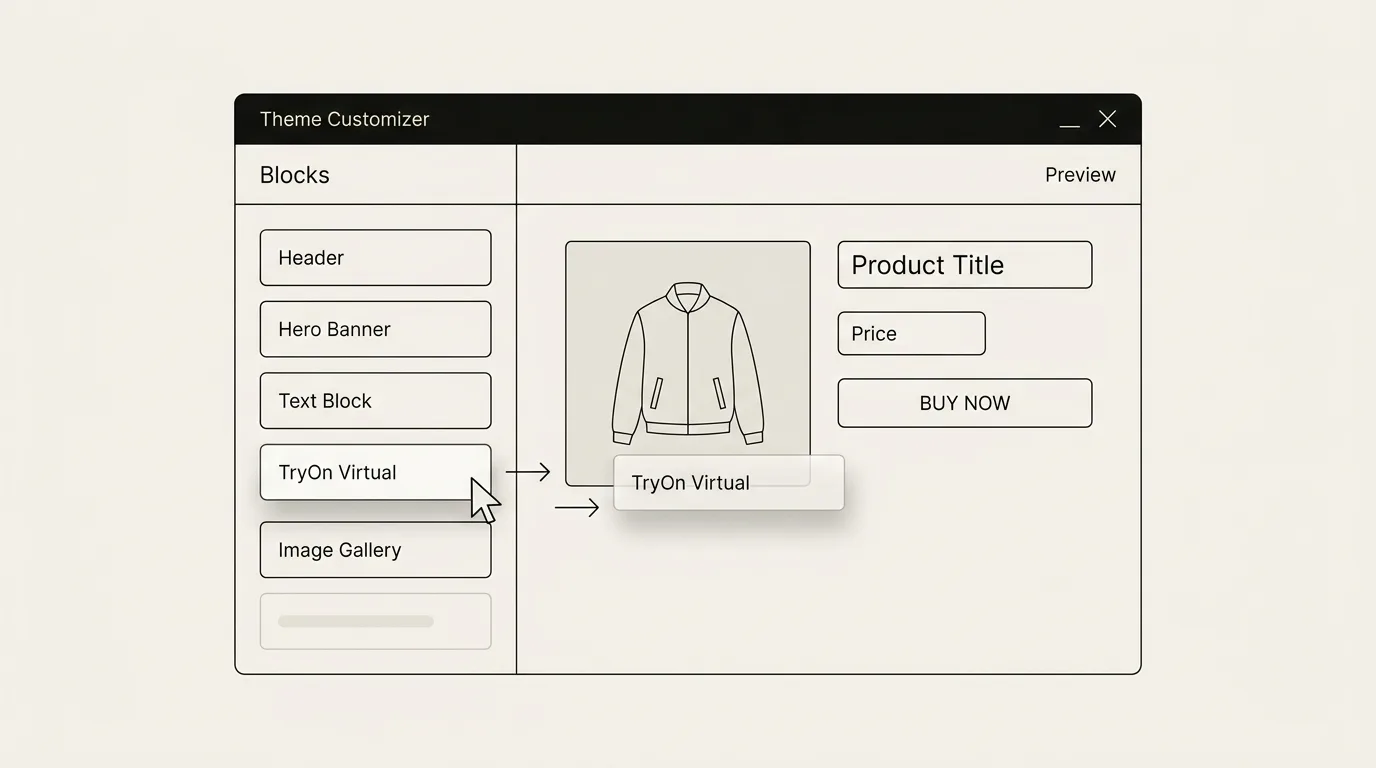
Step 3: Enable the Theme Extension
Navigate to Online Store → Themes → Customize in your Shopify admin. Add the TryOn Virtual block to your product pages. The extension works with every Shopify theme — no custom coding required.
Step 4: Map Products to Models
Associate each product variant with its corresponding 3D model. This ensures shoppers see the correct frame, color, and size when trying on.
Step 5: Go Live
Publish your theme changes and your customers can immediately start trying on products in real-time.
Performance Optimization Tips
- Optimize 3D models to under 2MB for fast loading
- Enable lazy loading so the try-on widget loads only when visible
- Test on mobile — over 60% of Shopify traffic comes from mobile devices
Measuring Success
Track these metrics after enabling virtual try-on:
- Try-on engagement rate — What percentage of visitors use the feature?
- Conversion lift — Compare conversion rates before and after
- Return rate changes — Monitor returns over 30-60 days
Our Analytics Dashboard provides all these insights in real-time.
Next Steps
For category-specific guides, see eyewear virtual try-on, watch try-on, clothing try-on, jewelry try-on, and shoes try-on. For the broader integration overview, head to the dedicated Shopify virtual try-on page.
This article is part of The Complete Guide to Virtual Try-On in Ecommerce — our full breakdown of try-on types, product categories, ROI, and platform options.