Virtual Try-On Is Not Just for Shopify
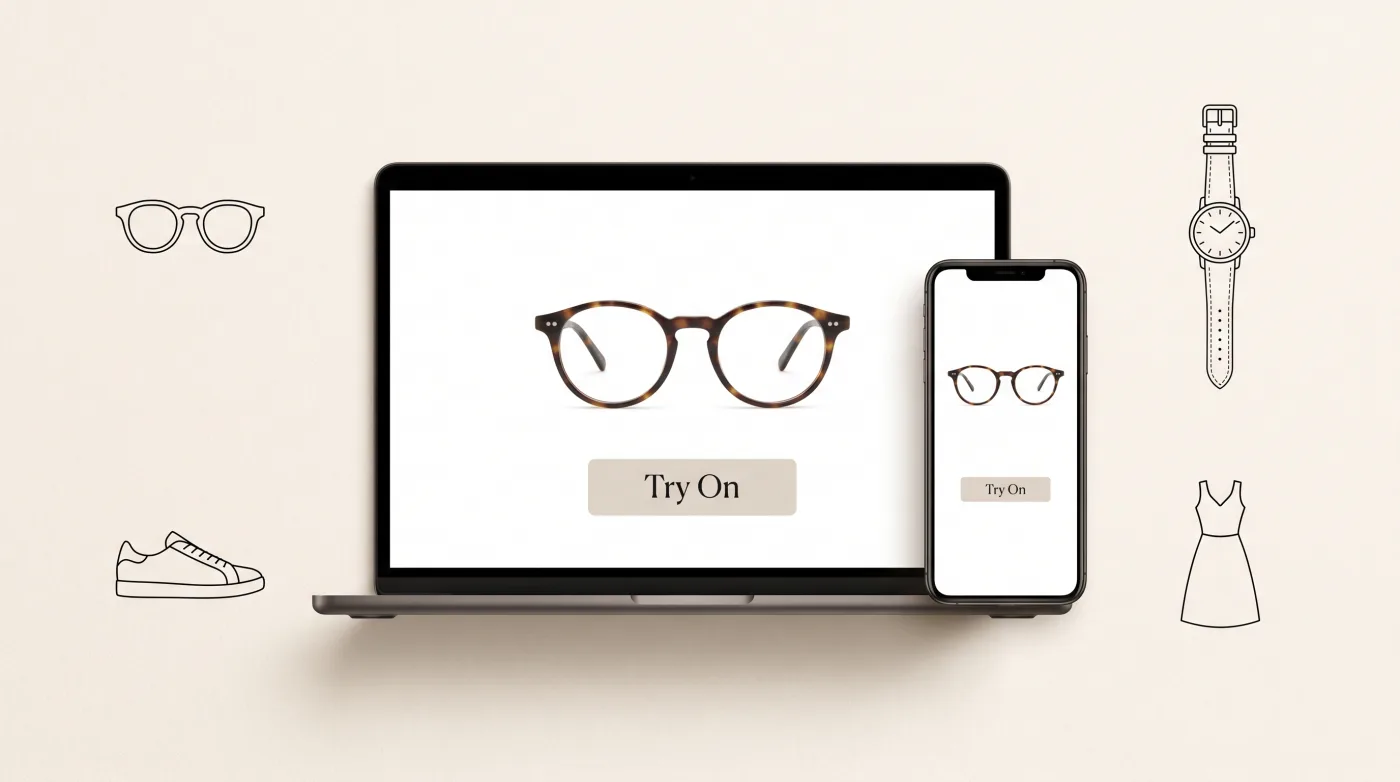
When most merchants hear "virtual try-on," they think of Shopify apps. And while Shopify is a major channel, the technology is not limited to any single platform. If you sell eyewear, clothing, watches, jewelry, or shoes online — regardless of where your store is hosted — you can offer customers a try-before-you-buy experience.
TryOn Virtual's merchant panel is a standalone dashboard designed for exactly this purpose. It gives you full control over your virtual try-on configuration without requiring a Shopify store.
The Merchant Panel: Your Universal Dashboard
The merchant panel is a web-based dashboard where you manage every aspect of virtual try-on: products, 3D assets, AI swap settings, team access, analytics, and the embed snippet that connects everything to your storefront.
Here is what the workflow looks like:
1. Create Your Account
Sign up at the merchant panel and configure your store profile. You will enter your store name, URL, and the product categories you want to enable for try-on.
2. Add Products
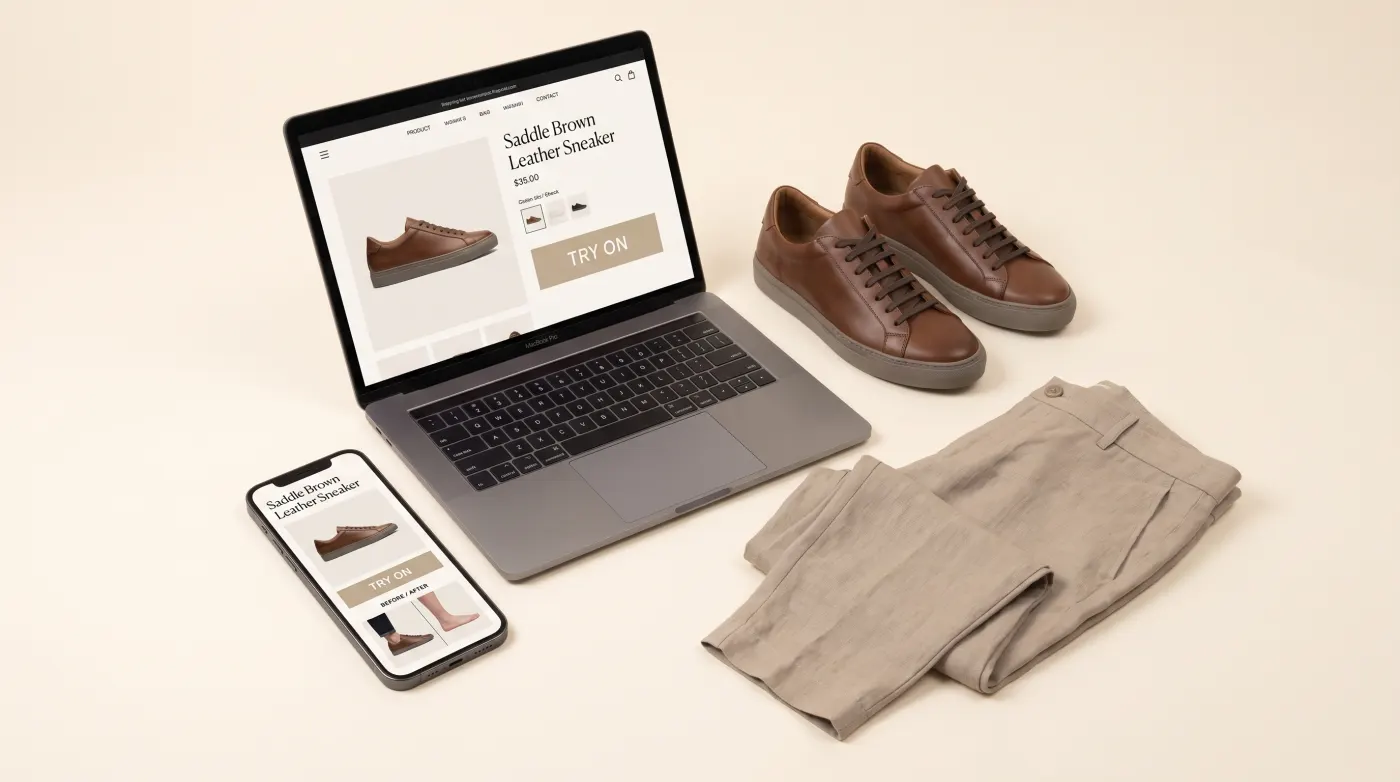
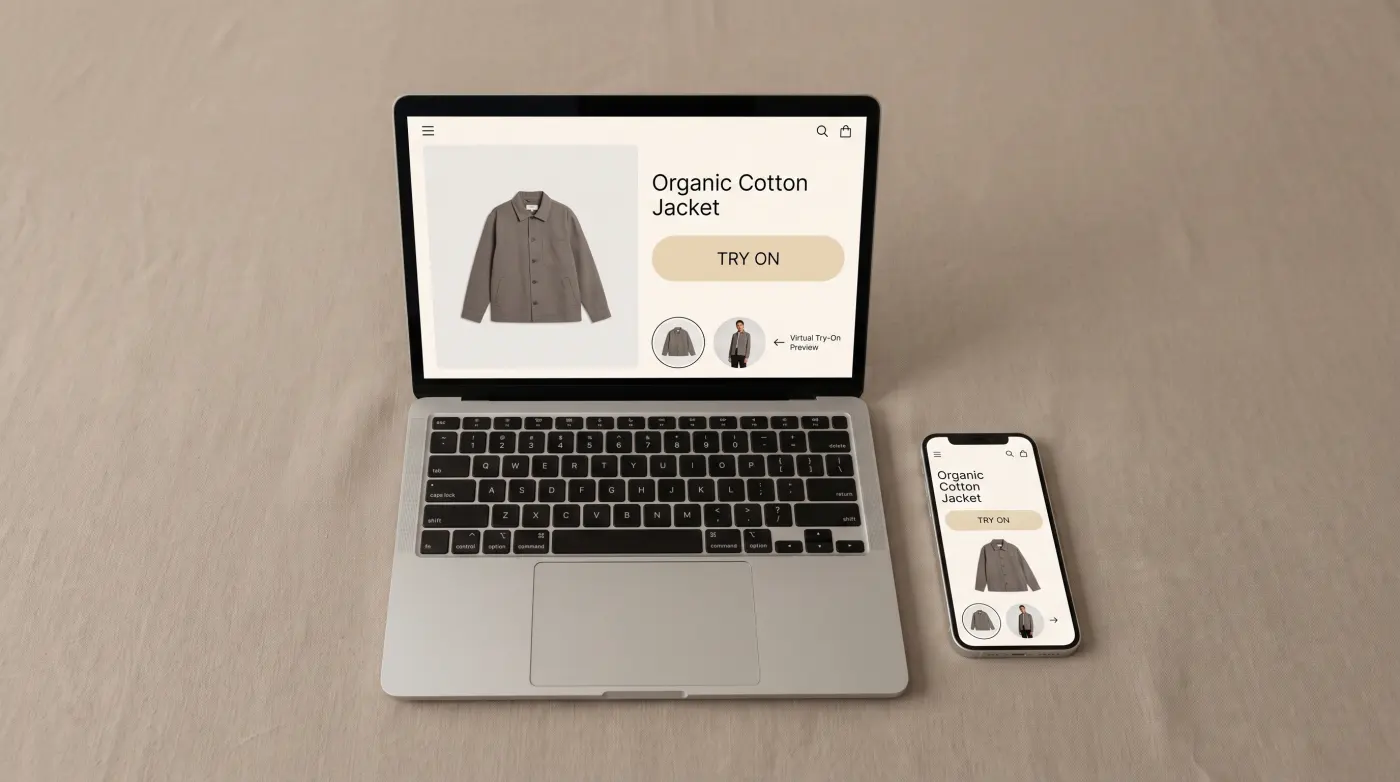
Add products manually or import them via CSV. Each product can have variants (sizes, colors) and can be configured for either 3D AR try-on (if you have 3D models) or AI swap (if you only have product images).
3. Upload Assets
For 3D try-on, upload GLB, GLTF, USDZ, SPZ, or PLY files. The panel validates file formats and automatically optimizes assets for web delivery via CDN.
For AI swap, upload product reference images — standard e-commerce photography works. The AI engine handles the rest.
4. Generate Your Embed Snippet
The panel generates a single JavaScript snippet that you paste into your storefront template. It looks like this:
<script
  src="https://widget.tryonvirtual.com/embed.js"
  data-store-id="your-store-id"
  async
></script>
That is it. One script tag, no build tools, no npm packages, no framework dependencies.
5. Go Live
The widget automatically detects product pages on your storefront and renders a "Try On" button for products that have try-on enabled in the panel. Customers click the button, and the full try-on experience loads in an overlay.
Platform-Specific Integration
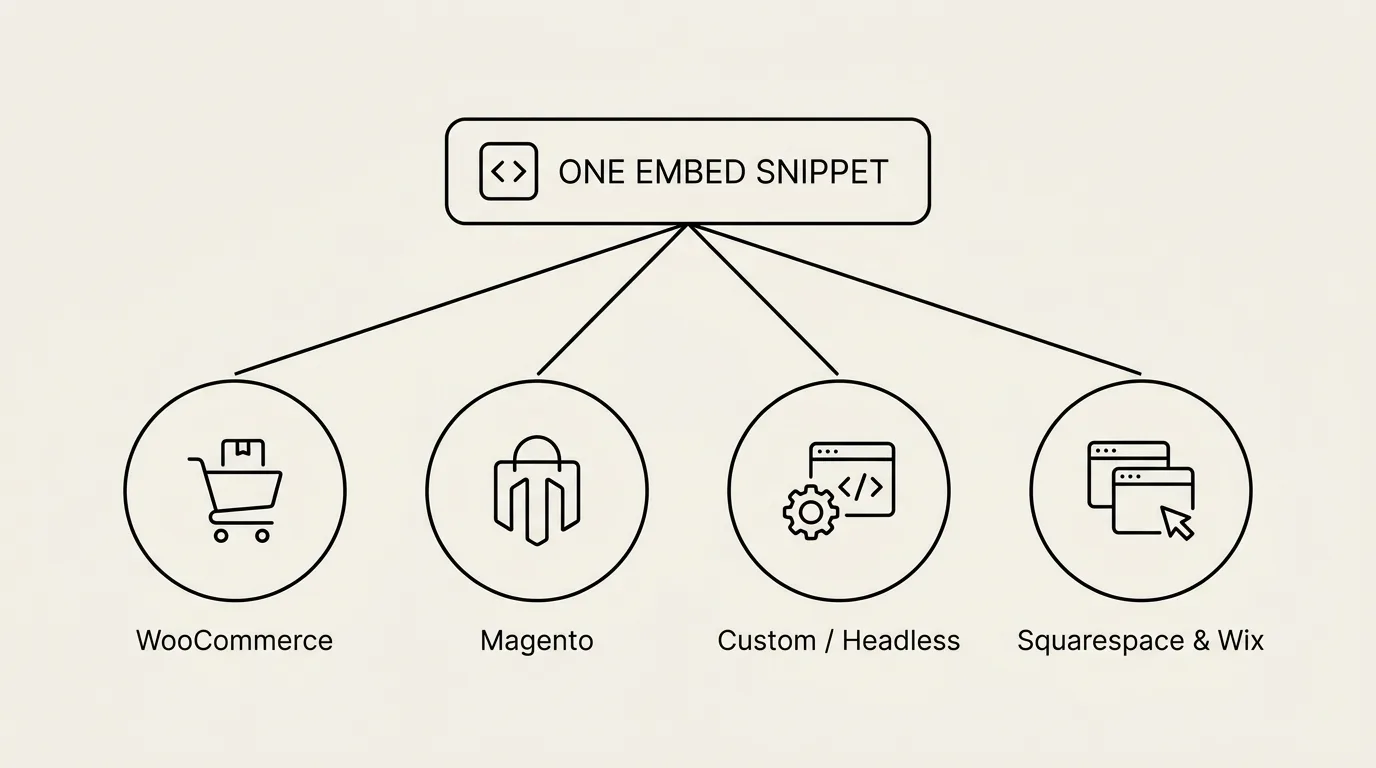
While the embed snippet works universally, here are notes for the most common platforms.
WooCommerce
Paste the embed snippet into your theme's footer.php file or use a plugin like "Insert Headers and Footers" to add it without editing theme files. The widget reads product data from the page and matches it to your panel configuration.
WooCommerce merchants who want deeper integration can use the REST API to sync products programmatically. This is useful for stores with large, frequently-changing catalogs.
Magento
Add the snippet to your Magento theme's default layout XML or paste it into the CMS block that loads on product pages. Magento's stricter Content Security Policy may require adding widget.tryonvirtual.com to your CSP whitelist.
Custom / Headless Storefronts
For headless commerce setups (Next.js, Nuxt, Gatsby, or custom React/Vue builds), you have two options:
Option A: Embed snippet. Add the script tag to your HTML template. The widget will render in the DOM and handle its own lifecycle.
Option B: API integration. Use the TryOn Virtual REST API to build a fully custom try-on experience within your existing frontend. The API provides endpoints for product lookup, asset URLs, session management, and AI swap requests.
The API approach gives you complete control over the UI but requires more development effort. Most merchants start with the embed snippet and migrate to API integration only if they need a deeply customized experience.
Squarespace, Wix, and Other Hosted Platforms
Any platform that allows custom code injection supports the embed snippet. In Squarespace, add it via Settings > Advanced > Code Injection. In Wix, use the Custom Code feature under Dashboard > Settings.
Team Management
The merchant panel supports role-based access for teams:
- Owner: full access including billing and team management
- Admin: product management, settings, and analytics
- Editor: asset uploads and product configuration
Invite team members by email, and they receive access to the panel with permissions matching their role. An activity log tracks all changes for audit purposes.
Analytics Without Shopify
One advantage of the standalone panel is that analytics work identically regardless of your storefront platform. The dashboard tracks:
- Widget opens: how many customers click the try-on button
- Camera grants: how many allow camera access (for AR try-on)
- Photo uploads: how many upload a photo (for AI swap)
- Saved looks: how many save or screenshot their results
- Add-to-cart events: how many proceed to add the product to their cart
These metrics are available in real time and can be exported as CSV for deeper analysis. Learn more about what you can track in our analytics guide.
When to Use the Panel vs. the Shopify App
If you run a Shopify store exclusively, the Shopify app is the fastest path — it integrates natively with your admin and theme.
If you sell on WooCommerce, a custom platform, or multiple channels, the merchant panel is the right choice. It is platform-agnostic and designed to work everywhere.
Some merchants use both. They install the Shopify app for their Shopify store and use the merchant panel for their custom website or wholesale portal.
Getting Started
The merchant panel is available now. Create an account, add your first products, and embed the widget on your storefront in under an hour. Visit the Merchant Panel feature page to learn more, or book a demo to see it in action.
This article is part of The Complete Guide to Virtual Try-On in Ecommerce — our full breakdown of try-on types, product categories, ROI, and platform options.